
In order to make a new reusable parts with different dimensions, it is important to use parameterization to define the part characteristics. It can be done through the use of the Expressions windows (CTRL + E). At the Expressions windows it is possible to define variables and assign values to them. An example can be seen on figure 1.
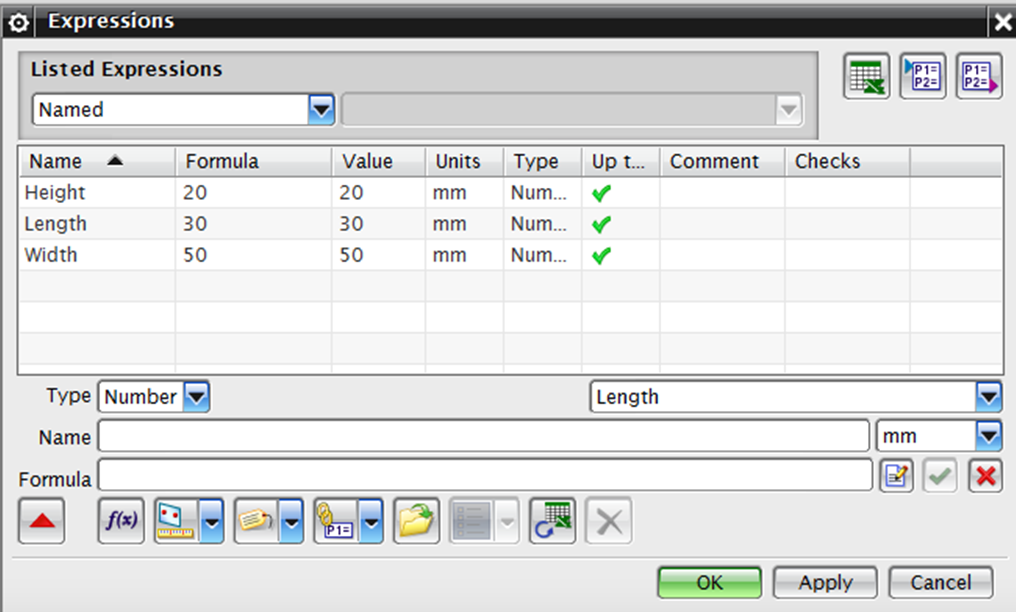
Figure 1 – Expressions window
Using the expressions defined before, the model should be designed. At this example, the reusable part is a simple box and the parameterization done in the Sketch and Extrude can be seen on figure 2 and figure 3. After the modelling is done, take a screen shot to use as legend image for your new reusable part.
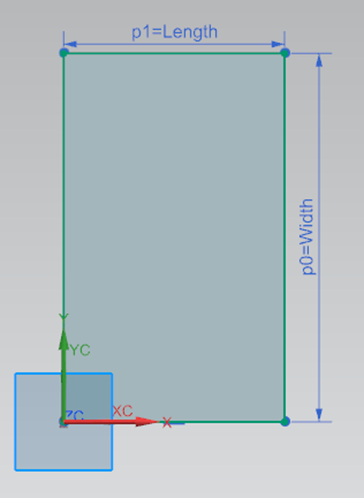
Figure 2 – Rectangular Sketch
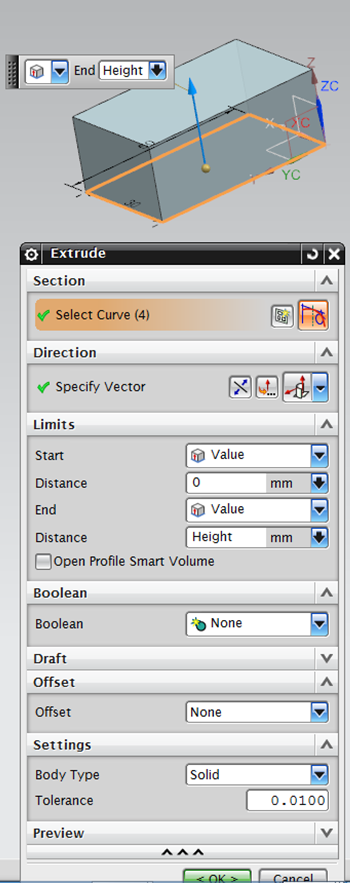
Figure 3 – Extruded Box
The next step is creating the spreadsheet which will define the part primary parameters. The expressions to be editable when adding the library part will need to be defined and match the expressions named in the part file, as shown in heading line, on figure 1. The values statement should be finished with an end. Empty cells below a defined one will use the parameter defined until a new value is defined again. On the figure 4, the cell C4 will use the value of 50 for the parameter Width. In this example, the reusable part will have three different configurations.
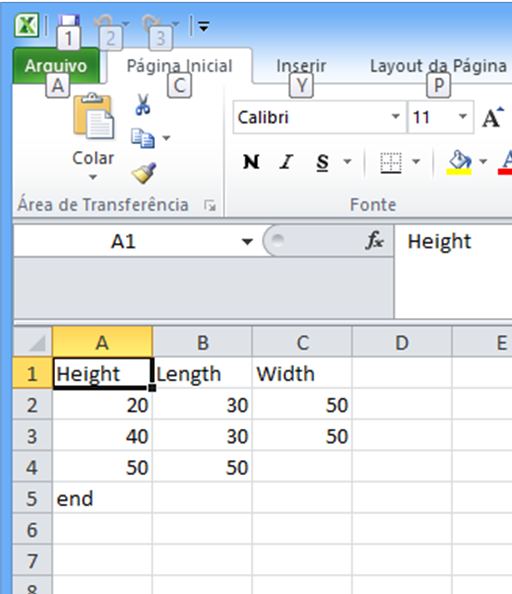
Figure 4 – Editable Expressions Spreadsheet
To define a new usable part library go to File > Utilities > Customer Defaults > Gateway > Reuse Library, as you can see on figure 5 and figure 6. If the check box Display Reuse Library (over the field Native NX) is not checked, check it. Define a new Library name and add the patch to it. In this example you can see the new library Modules Library and its patch on FIGURE XX. The files created before for your new reusable part (part file, spreadsheet and legend image) should be kept on the same folder stated at the library definition. Probably it will be necessary to restart NX in order to the changes by applied and the new library to be created.
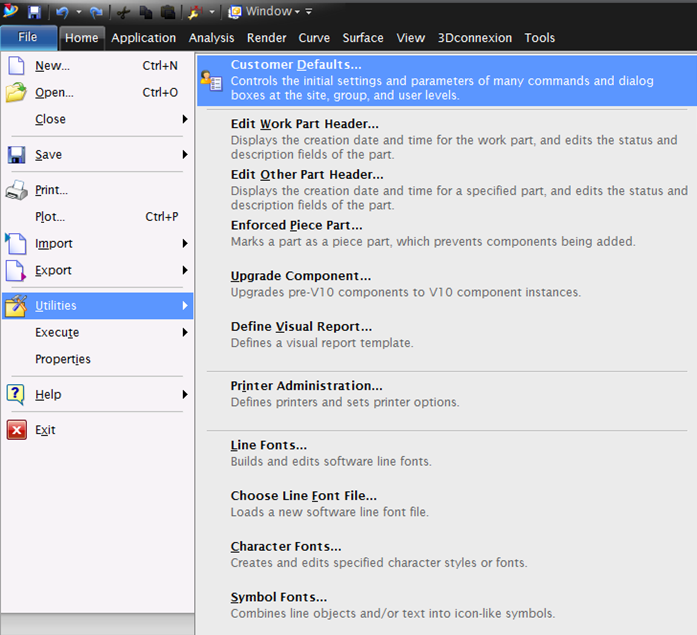
Figure 5 – Customer Defaults path
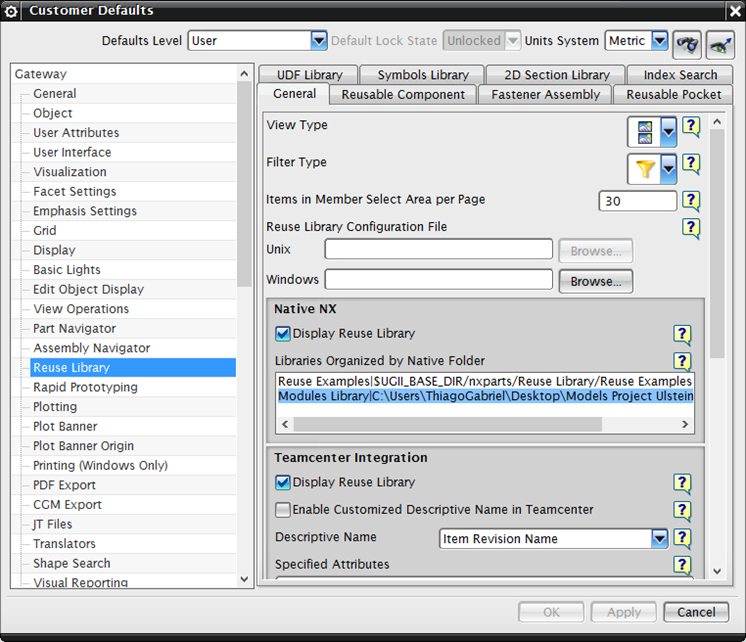
Figure 6 – Customer Defaults window
In order to completely configure your new reusable part go to the new library, find your new part, right click it and select Edit KRX File (figure 7). On the Create/Edit KRX FILE (figure 8) it is possible to assign the legend image and the spreadsheet to your new reusable part.
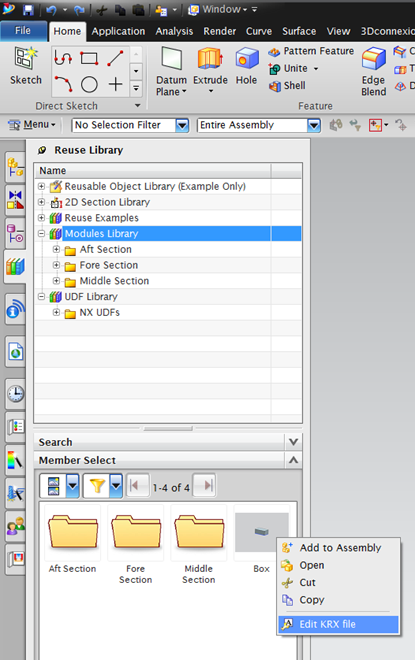
Figure 7 – Path to edit KRX file
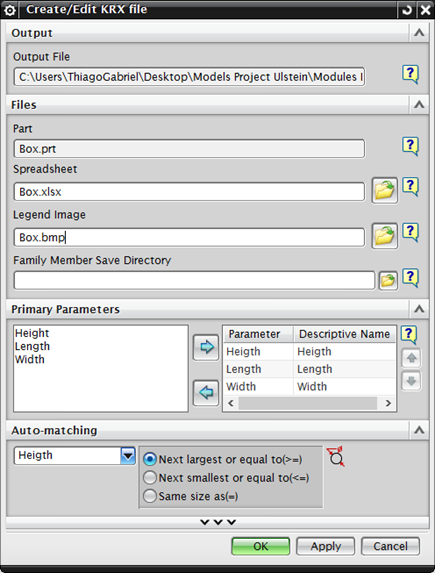
Figure 8 – Create/Edit KRX window
After all configuration is done, it is possible to add the recent created part to a new design, just dragging it to the desired place. The Add Reusable Component dialogue windows will show up, as you can see on figure 9. Here, it is possible to select, according to the dimensions specified on the spreadsheet, the part dimensions. It is also possible to do other configurations, like Placement options.
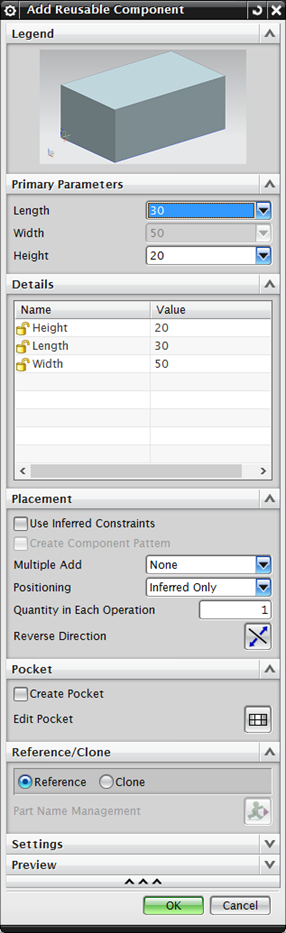
Figure 9 – Add Reusable Component window